To translate YAML files with POEditor, you first need to set up your localization project. Here are the steps.
1. Create a localization project
Log in to your POEditor account, click on the + button to create a translation project and add a language to it (the software's source language).
2. Import strings from YAML file
In the project page, click on Import to upload the strings from your YAML file to the localization project.
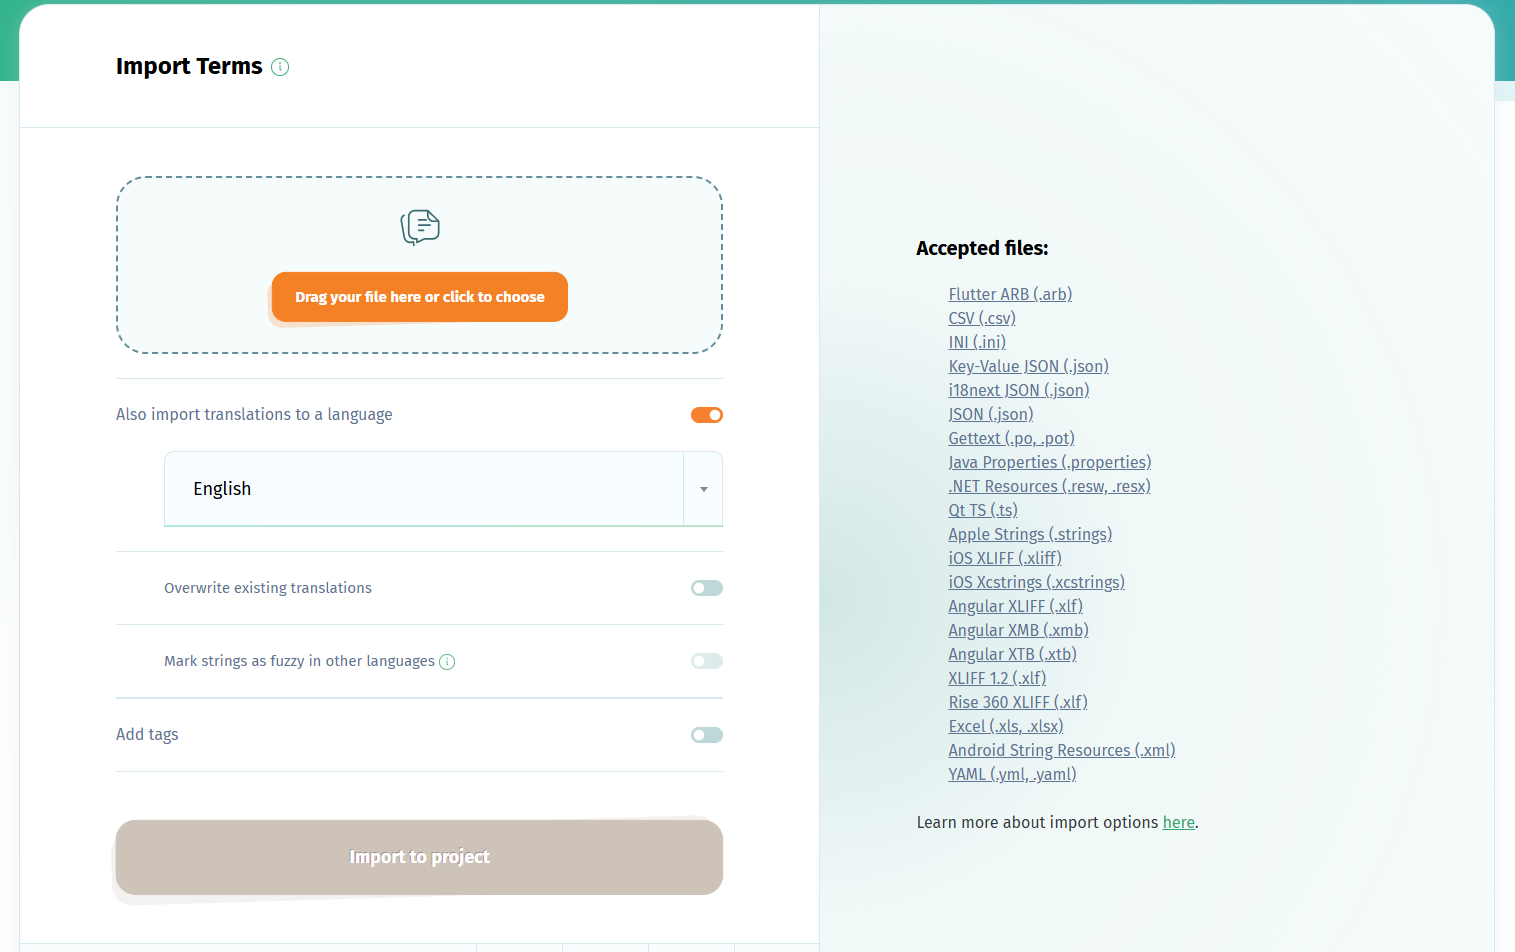
Don't forget to choose to Also import translations to a language and to select your software's source langauage here.
This language will automatically be suggested as your project's Default Reference Language after you import the translations. You can change the Default Reference Language in the project's Settings.
3. Localize YAML file to target languages
Add the languages you want the app localized in, invite contributors to join the translation and start localizing your app. You can find more info about how to manage contributors here.
If you don't have your own contributors, you can use other translation options.
4. Export localized YAML files
When you are done localizing the YAML strings, you can export them to your computer by using the Export button in any language page or use another export option.