You can translate Articulate Rise 360 courses with POEditor using various translation options. To set up your Rise 360 translation project, follow the steps below.
1. Create a translation project for your Articulate Rise course
Log in to your POEditor account, create a new translation project and add a language to it (your course's default language).
2. Import Articulate XLIFF file to translation project
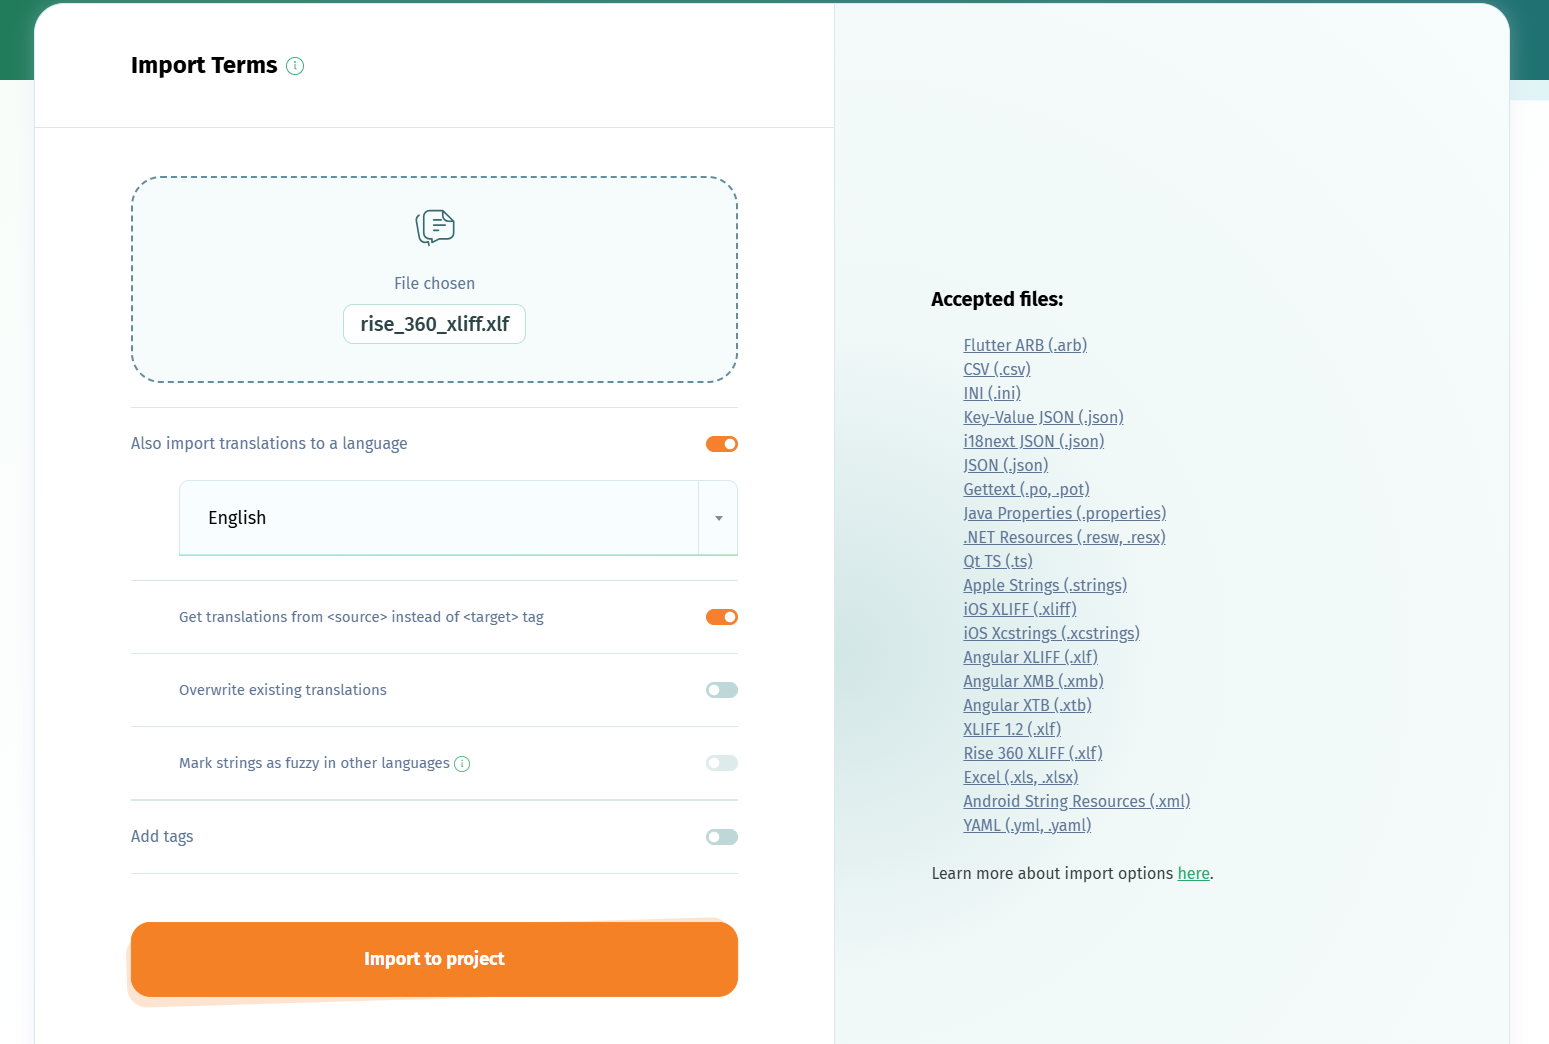
In the project page, use the Import functionality to upload the strings from your Articulate XLIFF file.
Make sure you choose to Also import translations to a language the source language, checking to get translations from <source> instead of <target> tag.
After you import the source language, we strongly recommend you set it as your project's Default Reference Language.
3. Translate your Articulate Rise 360 course
Add to the project the target languages into which you want to translate your Rise 360 course. Then invite your translators to join the localization project as contributors and start translating your course.
Your translators will see the course's source language displayed in the translation pages just like in the image below.
If you don't know any people to help you with translating your Rise 360 course, you can also order translations or use AI translation.
4. Export localized Articulate XLIFF files
Once you are done with the localization of your Articulate Rise 360 course, you can download your target languages in the Articulate XLIFF file format using the Export functionality.
Keep in mind that to export a language in the Articulate .xlf format you must have a Default Reference Language set on your translation project.


