Project owners and administrators can add terms to a localization project at POEditor. They can import them to the project from a file or add them manually. They can also use the integrations with code hosting platforms, the WordPress plugin (when localizing a WP plugin or site) or the API.
Importing terms in the project page
In the project page, click on Import to upload strings from any of the supported localization file formats.
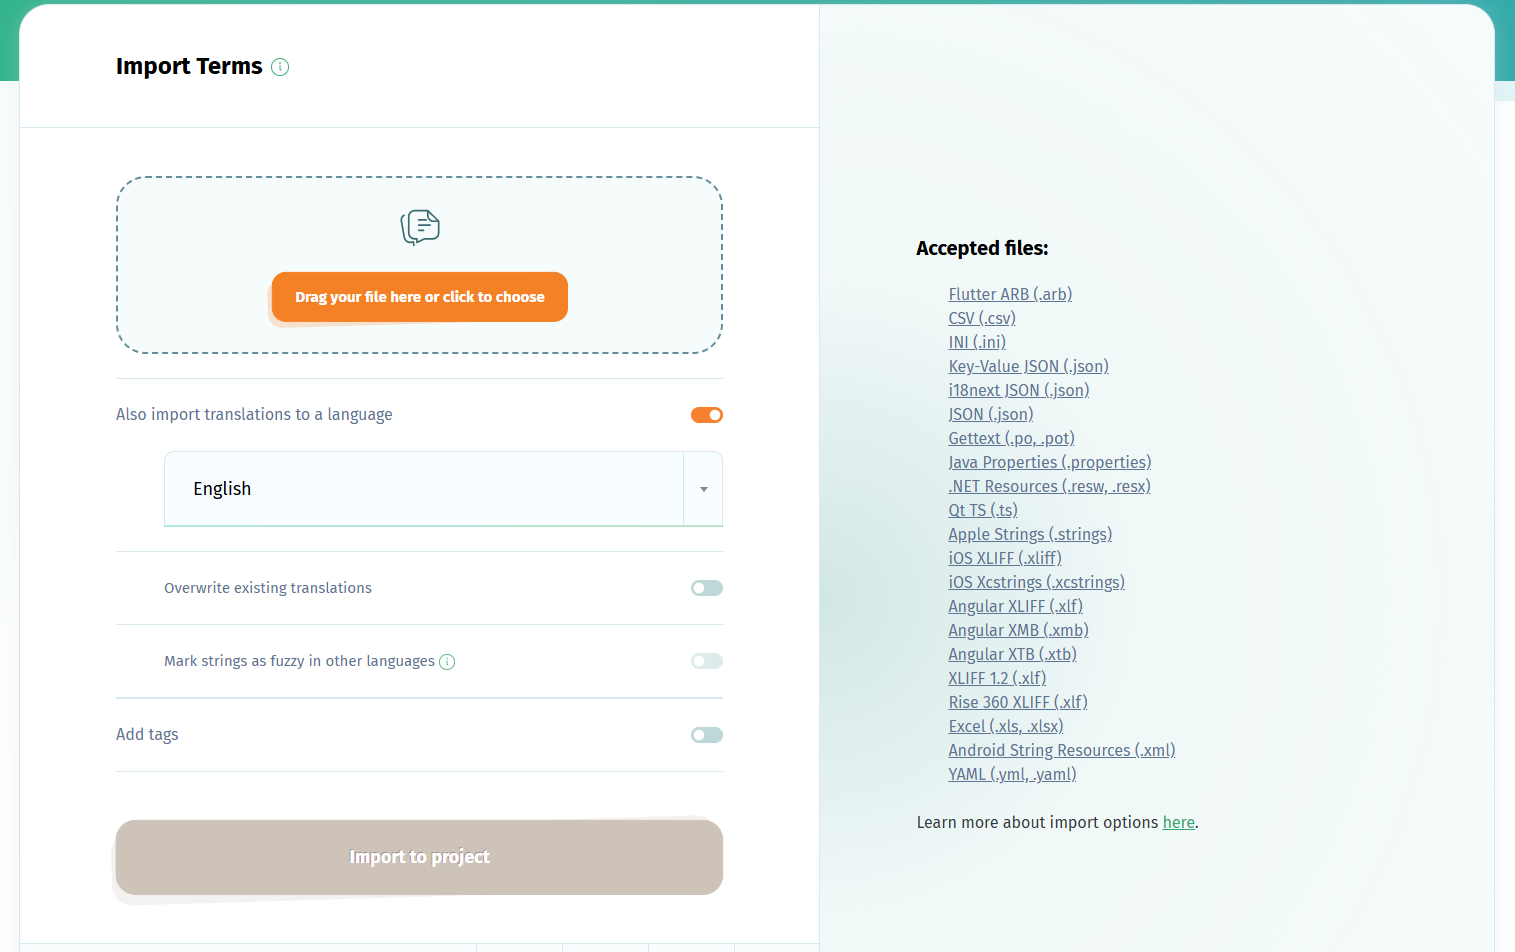
There are a number of Advanced Options you can choose at the import step. They are described here.
If your terms are keys/string IDs, like it's the case for Android or iOS localization files, you will also want to check the box to Also import translations to a language the language in your project which you also use as source language in your software. Setting this language as Default Reference Language will show the translations in the source language on the left column, in the translation page, instead of the labels.
Manually adding terms in the Terms page
If you want to add terms manually, one by one, go to the project page and click on Terms.

You can manually add a term here by clicking on the + button at the top of the page, typing it and pressing Save.

To open the Add Terms form, you can also click on the + key (the keyboard shortcut to add a new term), when your focus is not in a text box.
Adding terms from GitHub, Bitbucket, GitLab or Azure Repos
Before adding terms, you need to connect your POEditor account with your code hosting platform of choice (in Account Settings) and a language in your localization project. Then, link this language with the file in your repo containing your software's source language.
To add terms, click on the Import button corresponding to the language linked to that file. By clicking on it, you have three options:
Import terms - Imports your terms from the file to the selected POEditor language.
Import terms and translations - Imports your terms and the corresponding translations from the file to the selected POEditor language.
Import translations - Imports translations from your file to the language in your POEditor project. Note that you can import translations only after having imported terms.
If your terms are labels (keys/string IDs), you can use the Import terms and translations option to bring both the keys and the source language to the project in one go. After doing so, set this language as Default Reference Language in the project's Settings.

You can use the Import from option at the bottom of the page to perform a bulk action for multiple languages at a time.
Adding terms from WordPress
Before being able to add terms, you need to install the POEditor translation management plugin to your WP instance, so you can connect your POEditor account. Then, create a project and add a language to it. Link the local WordPress file to the language you've created, then press the Export button next to it to send the terms from WordPress to your POEditor project.

A more detailed guide to setting up WordPress localization project is available here.
Adding terms via API
To add terms with the API, use the terms/add method.
What gets updated when a new term import is made
The plural forms are updated whenever a new terms import is made to a localization project. If no plurals exist in the file, the ones in the project are deleted.
The reference attribute also gets updated (except for when the import is made from a Key-Value JSON file). If there are no comments for a term in the project, the first comment that term has in the file gets imported to the project. Any new terms imported to the localization project are added at the end of the terms list.
To keep track of the imported strings, mark them with a tag. Tagging strings allows you to filter them during translation and on export.