To edit a INI file online, you need to have an account at POEditor (it's free and takes just a few seconds to register) and follow these steps.
Step 1: Add a new project in your Dashboard.
Step 2: Add a language to the project and then import the strings from your INI file, using the Import functionality in the project page.
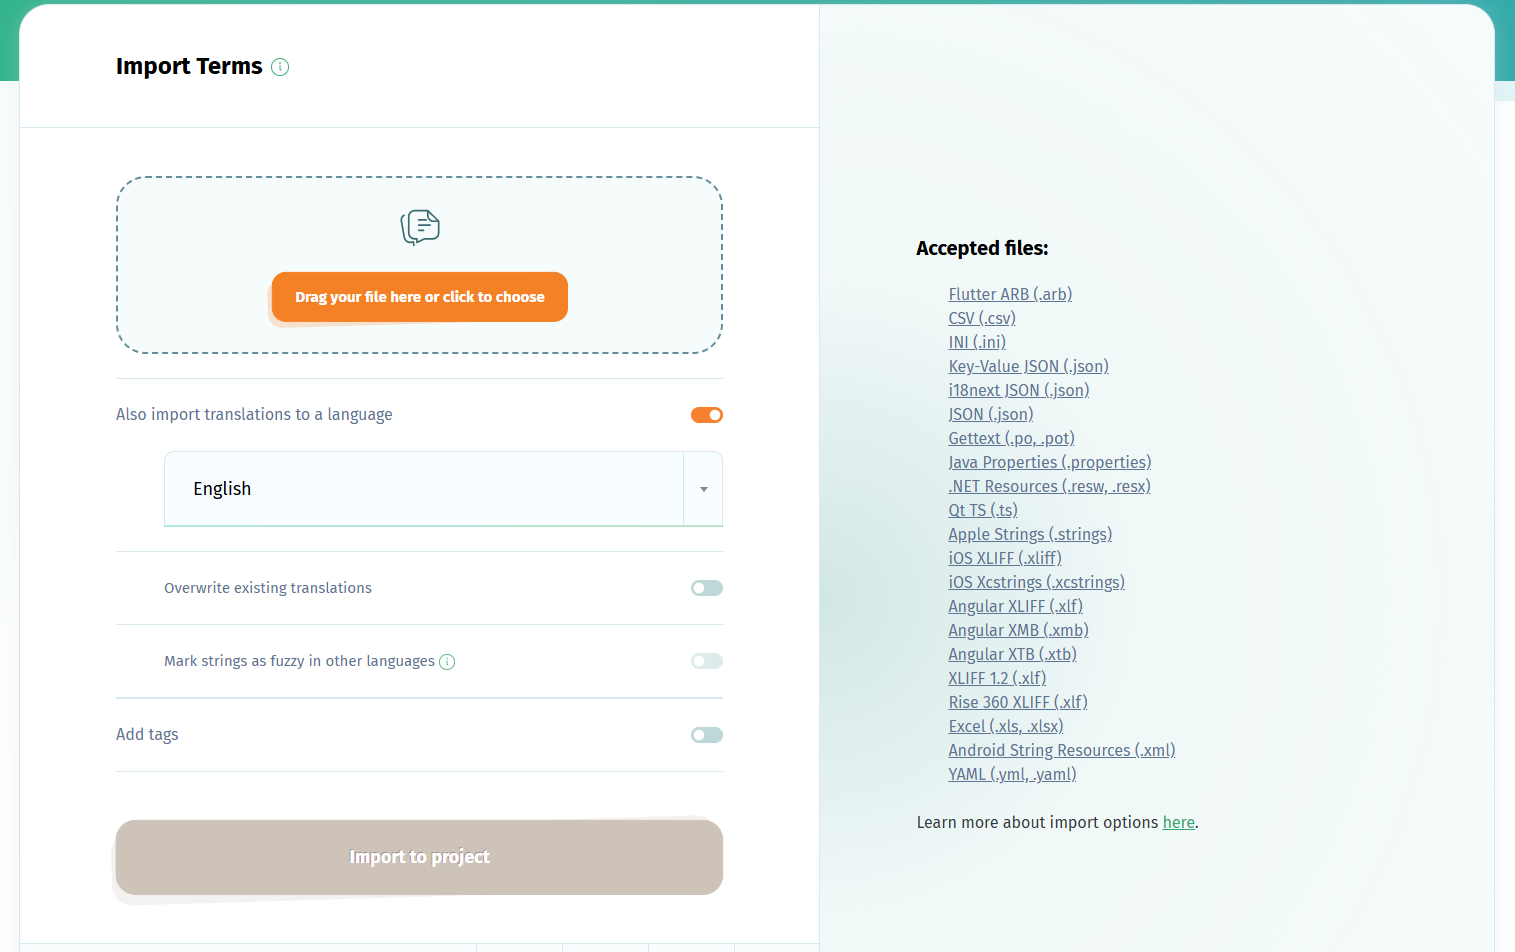
Choose in the import options to Also import translations to a language and pick the language you've just added.
This language will automatically be set as your project's Default Reference Language after you import the translations. You can change the DRL in the project's Settings.
Step 3: Add more languages to the project and manage their translation, with the optional help of contributors. There are also other translation options you can choose from.
Step 4: When you're done with the INI language edit, click on Export in any translation page to get a localized INI file.
Creating a first project launches a Free Trial, which increases the account's limit from 1000 strings to 30 000. When the trial period is over, the free account can still be used up to 1000 strings.