Translate iOS app strings easily with the localization management platform POEditor following the steps below.
1. Create localization project
Log in to your POEditor account, create a project in your Dashboard and add your iOS app's source language to the project.
2. Import source language from iOS .strings file
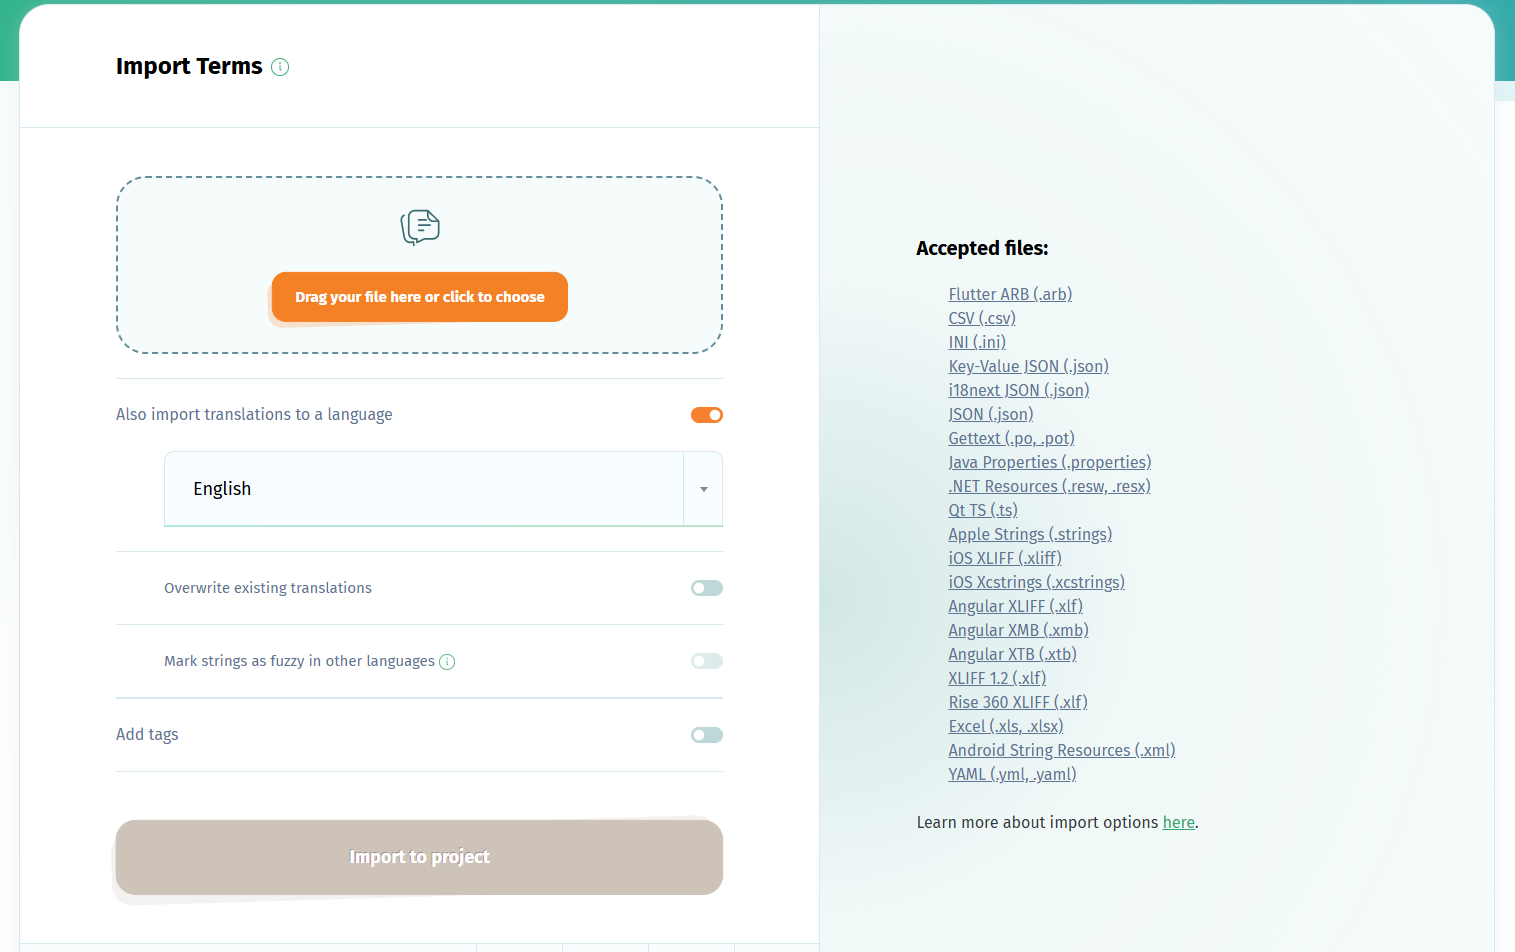
Use the Import option in the Project page to upload the source language strings from your .strings file to the app localization project.
At this step, you should select to also import translations to the source language in the project. The keys in your iOS app will be imported as terms.
If you imported the source language strings as translations, this language will automatically be suggested as your project's Default Reference Language (this will be visibile in your target languages for reference). You can change the DRL in the localization project's Settings.
If you also need to manage plural forms in your iOS app localization project, you can use the iOS XLIFF format instead. Xcode String Catalogs (.xcstrings) are also supported.
3. Translate iOS app strings to target languages
Add your desired target languages to the app localization project and add contributors to the languages, so they can start translating the app strings. There are also other translation options you can choose from.
You can export the iOS localization files whenever you want. There are multiple ways to export, described here.
If you want to automate the import/export steps of the localization process, consider using the POEditor API or one of the integrations with Git hosting services.