So there’s a software you want to localize into some languages, and you decided on crowdsourcing translation to achieve this.
If you’re working with any of these localization files, you can easily set up a crowdsourcing project at POEditor. Just create an account, and you’ll have access immediately to awesome localization management features that will automate your workflow.
This article is an overview of the steps you need to take to create a crowdsourced translation project and of the essential features to manage it.

Setting up the software localization project
Step 1. Create the project. In your account’s Dashboard, click on ‘Add a new project’. Give the project a name and, optionally, a description (which will be featured in the project’s join page).
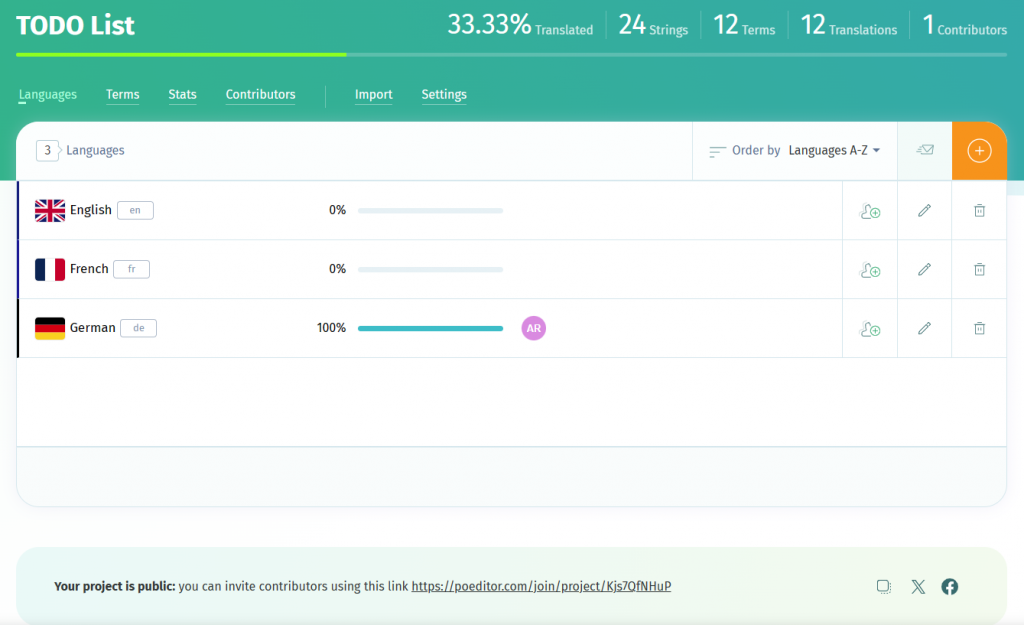
Step 2. Add languages to the project. In the Project Page, use the Add Language button to add the languages you want to have your software localized in. It’s recommended you also add the base/source language (the language your software strings are in right now).
Step 3. Import strings from language file. In the Project Page, click on Import in the top menu. Browse for your localization file and select to ‘Also import translations to another language.’ your base language. If your localization file contains labels/keys, set the language where you imported the translations as Default Reference Language.
Step 4. Make the localization project public. Go to the Project Page and click on Settings in the top menu. In Advanced Settings, set Public Project to Yes.
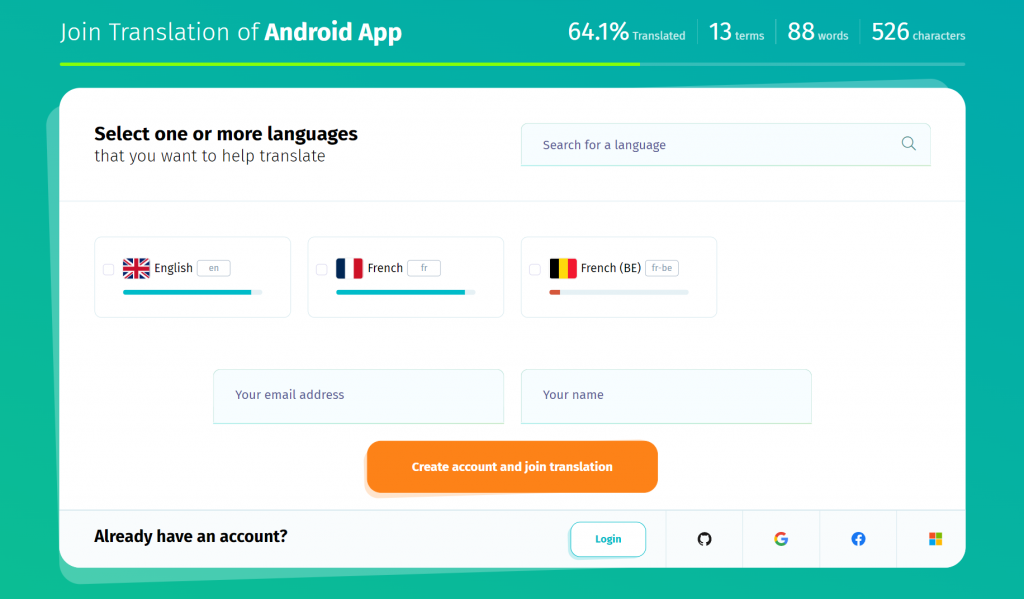
Step 5. Share the link to your crowdsourced translation project. At the bottom of the Project Page, as well as in the project’s Settings, you’ll find a link to your public join page. Share it wherever you find appropriate: websites, forums, social media pages etc. People will be able to join the project’s translation team by accessing it.

Assigning roles
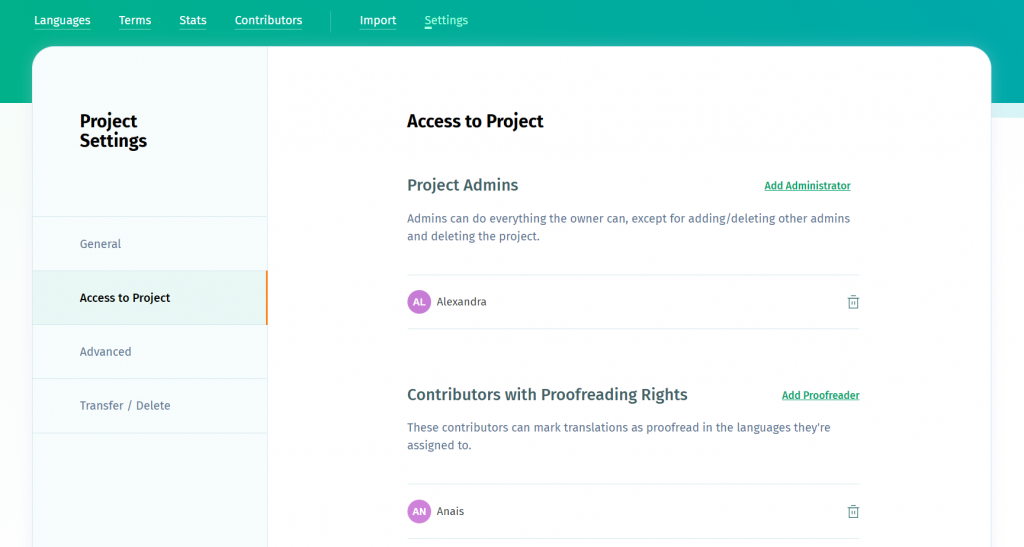
In the Settings page, you can add administrators and proofreaders to your crowdsourced translation project.
Administrators can do pretty much everything the project owner can do. Pretty much, because he/she can’t delete projects, access the Bitbucket/GitHub integration pages or add/delete other admins.
Proofreaders are contributors who can mark a translation as proofread or not in the languages they’re assigned to. To grant a contributor proofreading rights, enable Proofreading in Project Settings > Advanced Settings. Then use the Add Proofreader button under the Add Administrator button.
Note that if you want to prevent contributors without proofreading rights from editing or removing proofread translations, you can do that by enabling the option Lock Proofread Translations.
You can revoke these roles in Projects Settings.

Controlling access to the crowdsourcing project
You have some options to control the access to your crowdsourced localization project.
In Project Settings > Advanced Settings, you have the following:
- New Contributors Must Be Approved: makes everyone who joins the translation project through the public join page require your approval (the owner) or an admin’s, before being able to access the project.
- Contributors Can Add New Languages: lets people add new languages to the project in the public join page.
- Lock Completed Languages: hides any 100% localized language from the join page, so new volunteers can no longer join it.
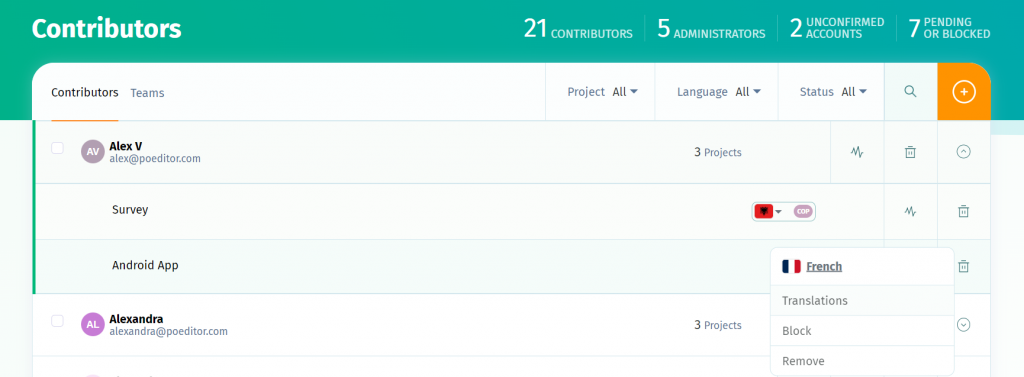
In your upper navigation bar, you can find a link to the Contributors’ page. Here, you can control each contributor’s access to the project, after they have joined it.

Next to each contributor, you’ll see a list of your projects to which he/she is contributing, as well as the languages to which he/she has access. Use the buttons described below to control their access.
- Translations: takes you to the corresponding project language, with the contributor’s translations filtered from the other translations.
- Block: restricts the contributor’s access to the language.
- Remove: removes the contributors from the language.
- Allow: unblocks the contributor’s access to the languages or gives them access if they’re pending approval for a public localization project.
Now that you know how to set up a crowdsourcing project, assign roles to your volunteers and control the access they have to the project, maybe it’s time to go one step further with improving the localization process. This article on how to automate localization will offer more insights regarding the ways POEditor can help maximize productivity for your localization team.