
Next.js is one of the popular ways to ship React apps today. It’s fast, it scales, and it’s straightforward. A lot of us use it for documentation sites, dashboards, storefronts, and marketing pages because it covers both developer ergonomics and production needs.
When you’re building for more than one market, it’s expected that your app speaks the user’s language. That means you need to implement internationalization (i18n) and localization (l10n).
In this guide, we’ll set up i18n in a Next.js app using next-intl. We’ll explain how to set it up for both the App and Pages Router.
Getting started
To follow this guide, you need a Next.js app. If you don’t have one yet, create it with:
npx create-next-app@latest [project-name]
During the prompts, you can pick App Router or Pages Router depending on your preference. If you already have an app, just note which router you’re using.
Once the project is up, install next-intl:
| npm i next-intl |
npm i next-intl
You may ask, why next-intl? Fair question. Next.js already has solid i18n routing, and next-intl sits nicely on top of it. It covers the essentials you actually need such as interpolation, pluralization, arrays, and more using ICU messages. It also works with both App Router and Pages Router, so you’re not boxed in.
With next-intl installed, we’re good to go.
Set up i18n for App Router (step-by-step)
For internationalization to work in your app, the first thing to do is add the next-intl plugin to Next.js. Open the next.config.ts file and replace it with this or adjust it to use this:
// next.config.ts
import createNextIntlPlugin from 'next-intl/plugin';
const withNextIntl = createNextIntlPlugin();

/** @type {import('next').NextConfig} */
const nextConfig = {};

export default withNextIntl(nextConfig);
What this does is that it wraps your Next.js config so next-intl can plug into the build and server runtime. Under the hood, the plugin looks for a “request config” (we’ll add it next) to know which messages file to load for each locale.
The next step is to declare your locales and set up a couple of helpers for navigation. For separation of concerns, it makes sense to keep i18n stuff in its own folder, so create src/i18n/ and then add routing.ts:
// src/i18n/routing.ts
import {createSharedPathnamesNavigation} from 'next-intl/navigation';

export const locales = ['en', 'de'] as const;
export type Locale = (typeof locales)[number];

export const defaultLocale: Locale = 'en';

/**
* These helpers are drop-in replacements for Next's Link/useRouter etc,
* but they keep the locale in the URL automatically.
*/
export const {Link, redirect, usePathname, useRouter} =
  createSharedPathnamesNavigation({
    locales,
    // 'always' -> URLs are always prefixed (/en, /de)
    // If you prefer / (no prefix) for default locale, use 'as-needed'
    localePrefix: 'always'
  });
This helps you declare supported languages and a default in one place. From here on, the locale-aware Link and router hooks keep /en or /de in your paths automatically.
Now, you need to tell next-intl how to load messages for each request. In the same src/i18n/ folder, create request.ts:
// src/i18n/request.ts
import {getRequestConfig} from 'next-intl/server';
import {locales, defaultLocale, type Locale} from './routing';
/**
* This runs on the server for each request.
* It validates the incoming locale and dynamically loads the right JSON file.
*/
export default getRequestConfig(async ({locale}) => {
const isSupported = locales.includes(locale as Locale);
const resolvedLocale = (isSupported ? locale : defaultLocale) as Locale;
const messages = (await import(`../../messages/${resolvedLocale}.json`)).default;
return {
locale: resolvedLocale,
messages
};
});
What this does is that the plugin you added in next.config.ts calls this to figure out which JSON to load based on the URL. It’s dynamic, so you only pull in what you actually need.
As the final core file needed for the setup, you need a small middleware to keep URLs locale-aware and to bump / to your default locale (/en in this example). Create src/middleware.ts:
// src/middleware.ts
import createMiddleware from 'next-intl/middleware';
import {locales, defaultLocale} from './i18n/routing';

export default createMiddleware({
  locales,
  defaultLocale,
  localePrefix: 'always',
  // Keep behavior deterministic (no automatic browser-language redirects).
  localeDetection: false
});

export const config = {
  /**
  * Apply middleware to the homepage and any path that already has a locale prefix.
  * Adjust the matcher if you add more locales.
  */
  matcher: ['/', '/(en|de)/:path*']
};
This makes sure every route is prefixed with a locale (e.g., /en, /de). Visiting / redirects to /${defaultLocale}, so / → /en. Browser-language detection is turned off to avoid surprise redirects during development. You can enable it if that’s your preference.
Add your translation files
Localization works by resolving keys to messages per locale. The clean way to manage this is to keep one JSON per language. At your project root, create a messages/ folder and add two files with the same keys in both.
messages/en.json:
{
"Home": {
"title": "Welcome",
"greeting": "Welcome back, {name}!"
}
}
messages/de.json
{
"Home": {
"title": "Willkommen",
"greeting": "Willkommen zurück, {name}!"
}
}
Keep the keys identical across locales (Home.title, Home.greeting, etc.). This is how tools (and people) keep translations in sync. We’ll connect this to POEditor later. For now, local JSON keeps the flow simple.
Update app structure
Next.js App Router uses a segment for the locale, so we’ll route everything through /[locale]/…. First, let’s make the root page nudge users to the default locale. Open src/app/page.tsx and add:
import { redirect } from 'next/navigation';

// This page only renders when the app is built statically (output: 'export')
export default function RootPage() {
redirect('/en');
}
Now create a [locale] folder under src/app/ and add a layout.tsx. This layout is a Server Component that validates the locale, loads the correct messages, and provides them to everything below:// src/app/[locale]/layout.tsx
import {NextIntlClientProvider} from 'next-intl';
import {notFound} from 'next/navigation';
import {locales, type Locale} from '@/i18n/routing';export default async function LocaleLayout({
children,
params: {locale}
}: {
children: React.ReactNode;
params: {locale: string};
}) {
// Validate the URL param
if (!locales.includes(locale as Locale)) notFound();
// Load messages for this locale
  const messages = (await import(`../../../messages/${locale}.json`)).default;
return (
    <html lang={locale}>
      <body>
        {/* Make messages available to all client components below */}
        <NextIntlClientProvider locale={locale} messages={messages}>
          {children}
        </NextIntlClientProvider>
      </body>
    </html>
  );
}
What happens in the code above is that <html lang={locale}> helps browsers, assistive tech, and SEO understand the language. NextIntlClientProvider exposes messages to client components via hooks.
Render a page that uses translations
Inside the same [locale] folder, add page.tsx. This one is a client component so we can use the useTranslations hook:
// src/app/[locale]/page.tsx
'use client';

import {useTranslations} from 'next-intl';

export default function HomePage() {
  const t = useTranslations('Home');
  const name = 'Jane';
return (
    <main style={{padding: 24}}>
      <h1>{t('title')}</h1>
      <p>{t('greeting', {name})}</p>
    </main>
  );
}
That’s it! Keys from messages/{locale}.json flow into the component, and next-intl handles formatting and interpolation. Hooks like useTranslations run in client components, the layout stays server-side.
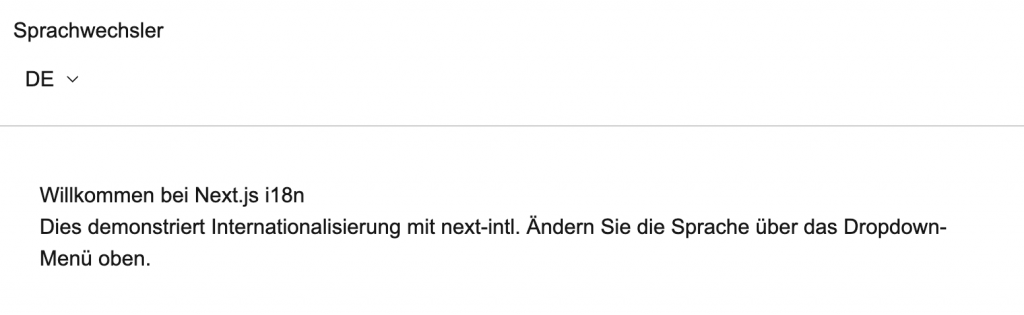
Add a language switcher
Before we jump to the Pages Router, let’s make switching languages easy. Create src/components/Navigation.tsx:
// src/components/Navigation.tsx
'use client';

import {Link, usePathname} from '@/i18n/routing';

export default function Navigation() {
  const pathname = usePathname();

  return (
    <nav style={{display: 'flex', gap: 12, padding: 16}}>
      {/* Link/Path helpers keep the current path but swap the locale */}
      <Link href={pathname} locale="en">EN</Link>
      <Link href={pathname} locale="de">DE</Link>
    </nav>
  );
}
Drop <Navigation /> anywhere under [locale]/layout.tsx or inside your page. Now you can hop between /en and /de without losing the current route.
You can access the complete project in this GitHub repository to compare the setup. Here is what the final file structure should look like:
your-app/
├─ next.config.ts
├─ messages/
│  ├─ en.json
│  └─ de.json
├─ src/
│  ├─ i18n/
│  │  ├─ request.ts
│  │  └─ routing.ts
│  ├─ middleware.ts
│  ├─ app/
│  │  ├─ page.tsx                # (optional) redirects "/" → "/en"
│  │  └─ [locale]/
│  │     ├─ layout.tsx           # loads messages + wraps provider
│  │     └─ page.tsx             # uses translations in a client component
│  └─ components/
│     └─ Navigation.tsx          # language switcher (EN/DE)
└─ package.json
Set up i18n for Pages Router (step-by-step)
If you’re on the Pages Router, the flow is a little different from App Router. We won’t use a [locale] segment, instead we’ll lean on Next.js built-in i18n routing (/en, /de, etc.), connect it with next-intl once in _app.tsx, and load messages per page with getStaticProps (or getServerSideProps if you prefer SSR).
To get started, you need to tell Next.js which locales you support and wrap your config with the next-intl plugin. Open next.config.ts and adjust it:
// next.config.ts
import createNextIntlPlugin from 'next-intl/plugin';

const withNextIntl = createNextIntlPlugin();

/** @type {import('next').NextConfig} */
const nextConfig = {
  // Next.js built-in i18n does the URL routing for Pages Router
  i18n: {
    locales: ['en', 'de'],
    defaultLocale: 'en',
    // You can flip this to true later if you want auto language detection
    localeDetection: false
  }
};

export default withNextIntl(nextConfig);
Next, create a “request config” so the plugin knows where to fetch messages. Make a folder src/i18n/ and add request.ts:
// src/i18n/request.ts
import {getRequestConfig} from 'next-intl/server';
export default getRequestConfig(async ({locale}) => {
// Guard against unexpected locales; fall back to 'en'
const supported = ['en', 'de'] as const;
const isSupported = (supported as readonly string[]).includes(locale);
const resolved = isSupported ? locale : 'en';
const messages = (await import(../../messages/${resolved}.json)).default;
return {locale: resolved, messages};
});
What this does is that whenever a request comes in for /de/..., the plugin calls this, we validate the locale, and we import the right JSON file. It’s dynamic, so you only load what you need.
Now add your translation files. Just like we did for App Router, keep one JSON per locale with the same keys.
/messages
  ├─ en.json
  └─ de.json
Next, add the provider once at the top of your app so every page can read translations. Create src/pages/_app.tsx:
// src/pages/_app.tsx
import type {AppProps} from 'next/app';
import {NextIntlProvider} from 'next-intl';

type Messages = Record<string, unknown>;

export default function MyApp({
  Component,
  pageProps
}: AppProps & {pageProps: {messages?: Messages; locale?: string}}) {
  const {messages, locale} = pageProps;

  // In dev you might navigate to a page before messages are loaded; guard it.
  if (!messages || !locale) {
    return <Component {...pageProps} />;
  }

  return (
    <NextIntlProvider messages={messages} locale={locale}>
      <Component {...pageProps} />
    </NextIntlProvider>
  );
}
This is important because _app.tsx is the Pages Router’s global shell. Wrapping with NextIntlProvider here means any component can grab translations with useTranslations.
Now load messages per page. For the homepage, create src/pages/index.tsx:
// src/pages/index.tsx
import {useTranslations} from 'next-intl';
import type {GetStaticPropsContext, InferGetStaticPropsType} from 'next';

export default function HomePage(
  _props: InferGetStaticPropsType<typeof getStaticProps>
) {
  const t = useTranslations('Home');
  const name = 'Jane';
  const count = 3;

  return (
    <main style={{padding: 24}}>
      <h1>{t('title')}</h1>
      <p>{t('greeting', {name})}</p>
      <p>{t('inbox', {count})}</p>
    </main>
  );
}

// SSG example; use getServerSideProps if your content is request-time
export async function getStaticProps({locale}: GetStaticPropsContext) {
  const messages = (await import(`../../messages/${locale}.json`)).default;
  return {
    props: {
      messages,
      locale
    }
  };
}
What’s happening here is that:
getStaticPropsruns once per locale when you build (next build). Because we set i18n.locales innext.config.ts, Next.js will call this forenandde.- Whatever we return in props becomes
pagePropsin_app.tsx, which the provider uses. - If this page were dynamic (say
pages/blog/[slug].tsx) and you’re statically generating, you’d also add agetStaticPathsthat returns paths for each slug for each locale. For purely server-rendered pages, swap togetServerSidePropsand the pattern stays the same.
Finally, let’s add a simple language switcher. With Pages Router, you can either set locale on <Link/> or call router.push with a locale option. Here’s a component that keeps the current path and flips locales:
// src/components/LanguageSwitch.tsx
import Link from 'next/link';
import {useRouter} from 'next/router';

export default function LanguageSwitch() {
  const {asPath, locale} = useRouter();

  // Simple toggle; in production you might list all supported locales
  const next = locale === 'en' ? 'de' : 'en';

  return (
    <nav style={{display: 'flex', gap: 12, padding: 16}}>
      <Link href={asPath} locale="en">EN</Link>
      <Link href={asPath} locale="de">DE</Link>
      {/* Or a single toggle link */}
      <Link href={asPath} locale={next}>Switch to {next.toUpperCase()}</Link>
    </nav>
  );
}
You can now add the <LanguageSwitch /> component into a page or a layout component you render on every page.
You can access the complete project in this GitHub repository to compare the setup. Here’s the final structure:
your-app/
├─ next.config.ts
├─ messages/
│  ├─ en.json
│  └─ de.json
├─ src/
│  ├─ i18n/
│  │  └─ request.ts                # tells next-intl how to load messages
│  ├─ pages/
│  │  ├─ _app.tsx                  # wraps app with NextIntlProvider
│  │  └─ index.tsx                 # loads messages via getStaticProps
│  └─ components/
│     └─ LanguageSwitch.tsx        # locale-aware links for Pages Router
└─ package.json
Now that we’ve set up i18n for both the App and Pages Router, it’s time to use it. In real apps you won’t just render static strings, you’ll pass values into messages, handle singular/plural cases properly, and format dates, times, and numbers the way people expect.
Interpolation and pluralization
Interpolation is just “put a variable inside a sentence.” You declare placeholders in your JSON and pass the values when you call t().
To better understand this, add a message with a placeholder to your English file. Open messages/en.json and add:
{
"Profile": {
"greeting": "Welcome back, {name}!"
}
}
Then add the same key to your other locale(s). For German, open messages/de.json:
{
  "Profile": {
    "greeting": "Willkommen zurück, {name}!"
  }
}
Notice the placeholder is the same in both ({name}). Now, you can use it in your component.
import {useTranslations} from 'next-intl';

export default function HomePage() {
  const t = useTranslations('Profile'); // points at "Profile" in your JSON

  // This is the dynamic value you want to insert
  const name = 'Jane';

  // Call t('greeting', {name: <value>}) to fill {name}
  return <p>{t('greeting', {name})}</p>;
}
Notice the placeholder is the same in both ({name}). Now, you can use it in your component. It’s also important to know that you can pass any value, not just strings. Numbers, booleans, even preformatted strings are fine:
t(‘Profile.greeting’, {name: user.displayName || ‘Guest’});
If you accidentally pass {username: 'Jane'} but your message uses {name}, nothing will be inserted. The keys must match.
Pluralization
Now let’s handle the very common “0 vs 1 vs many” problem. We’ll do this with ICU plurals so you don’t write if (count === 1) … in your components.
Start by declaring a pluralized message in English. Open messages/en.json and add a key with a {count, plural, …} block. I like to keep these under a small namespace, e.g. "Inbox":
{
  "Inbox": {
    "messages": "{count, plural, =0{No messages} one{One message} other{{count} messages}}"
  }
}
The string above is an ICU plural. It starts with {count, plural, …} where count is the value you’ll pass from code, and plural tells ICU to pick text based on that number. Inside, you define branches: you can match exact numbers (like =0 for “No messages”) and use category names (like one and other) so languages can apply their own rules. The other branch is required and acts as the fallback when nothing else matches.
Now add the same key path in your other locale(s). For German:
{
  "Inbox": {
    "messages": "{count, plural, =0{Keine Nachrichten} one{Eine Nachricht} other{# Nachrichten}}"
  }
}
Next, use it in your component:
import {useTranslations} from 'next-intl';
import {useState} from 'react';

export default function InboxDemo() {
  const t = useTranslations('Inbox'); // points at the "Inbox" object in JSON
  const [count, setCount] = useState(0);

  return (
    <main style={{padding: 24}}>
      <p>{t('messages', {count})}</p>

      <div style={{display: 'flex', gap: 8, marginTop: 12}}>
        <button onClick={() => setCount(0)}>0</button>
        <button onClick={() => setCount(1)}>1</button>
        <button onClick={() => setCount(5)}>5</button>
      </div>
    </main>
  );
}
You can literally click through 0 → 1 → 5 and watch the sentence switch branches. When you flip the site to /de, the message and number formatting change.
Quick tip: If you ever need ordinals (1st, 2nd, 3rd…), use selectordinal:
{
  "Profile": {
    "anniversary": "It's your {year, selectordinal, one{#st} two{#nd} few{#rd} other{#th}} year!"
  }
}
Formatting dates, times, and numbers
Localization isn’t just about translating words. You also want dates, times, and numbers to look right for whoever’s reading. With next-intl you can do this directly inside your messages (my default), or in code when you’re formatting values first and then dropping them into the UI.
Let’s start in messages. Add a few examples to your English file:
// messages/en.json
{
"Stats": {
"today": "Today's date is {d, date, medium}.",
"price": "Price: {p, number, ::currency/USD}",
"percent": "Completed: {v, number, ::percent}",
"customDate": "Published on {d, date, ::yyyyMMMdd}"
}
}
Use them in your component like this:
import {useTranslations} from 'next-intl';
export default function StatsBlock() {
const t = useTranslations('Stats');
return (
<>
{t('today', {d: new Date()})}
{t('price', {p: 29.99})}
{t('percent', {v: 0.42})}
{t('customDate', {d: new Date()})});
}
What’s happening is that {d, date, medium} prints a nice locale-aware date (so it changes automatically between, say, English and French). {p, number, ::currency/USD} renders currency with the right symbol and separators for the current locale while keeping USD. {v, number, ::percent} expects a fraction, so 0.42 becomes 42%. And ::yyyyMMMdd is a quick custom format (“skeleton”) without writing extra code.
If you prefer to format values in code first use the formatter hook:
import {useFormatter} from 'next-intl';
export default function FancyFormats() {
const f = useFormatter();
const price = f.number(2999.5, {style: 'currency', currency: 'EUR'});
const when = f.dateTime(new Date(), {dateStyle: 'long', timeStyle:
'short'});
const ago = f.relativeTime(-90, 'minute'); // "1 hour ago"return (
<>
<p>{price}</p>
<p>{when}</p>
<p>{ago}</p>
</>
);
}
The whole idea is that if the value is part of a sentence, format it in the message so translators see the full context and if you’re composing values first and then dropping them into the UI, use useFormatter.
Managing translations with POEditor
Local JSON is fine while you’re building, but once you have more than one language or more than one person, you want a place to manage strings without digging through files. That’s what POEditor gives you.
The flow is simple, you push your source JSON (usually English) to POEditor, translate there, then pull down JSON per locale and drop it back into /messages.
To get started, export your JSON translation, then import them to your POEditor project.

You can do this manually through the dashboard as shown above, or automate it with the POEditor API. Here’s what an upload request looks like using curl:
curl -X POST https://api.poeditor.com/v2/projects/upload \
  -F api_token="YOUR_API_TOKEN" \
  -F id="YOUR_PROJECT_ID" \
  -F updating="terms_translations" \
  -F file=@"messages/en.json"
This imports your translation keys and values into POEditor so you can start translating immediately. See the upload docs for everything you can tweak.
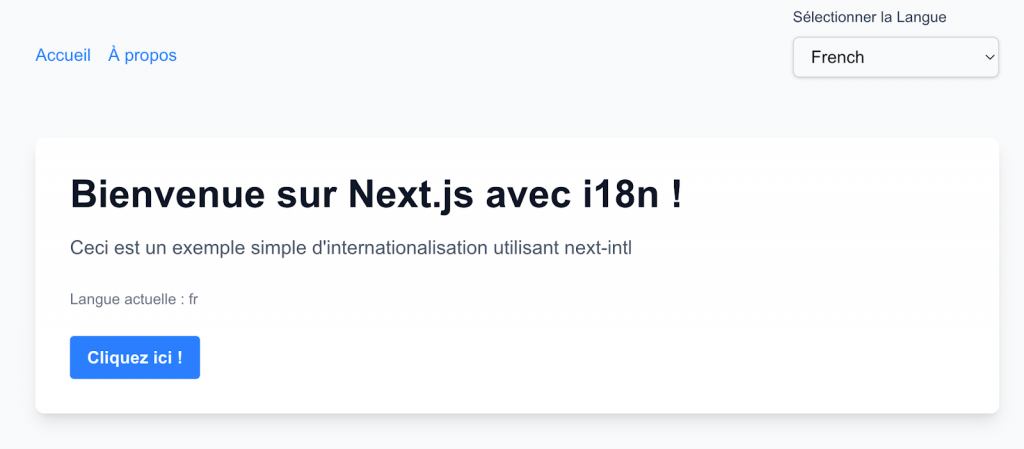
Once your translations are done, you can export updated files using their API too. For example, to download the French version:
curl -X POST https://api.poeditor.com/v2/projects/export \
  -d api_token="YOUR_API_TOKEN" \
  -d id="YOUR_PROJECT_ID" \
  -d language="fr" \
  -d type="json"
That returns a temporary URL. Download it and save as messages/fr.json (or whatever locale you’re adding). You can automate this step as part of a deploy or CI workflow by building it in with a simple script.
You should also note that POEditor imports ICU messages as-is and shows translators a small helper for plurals.
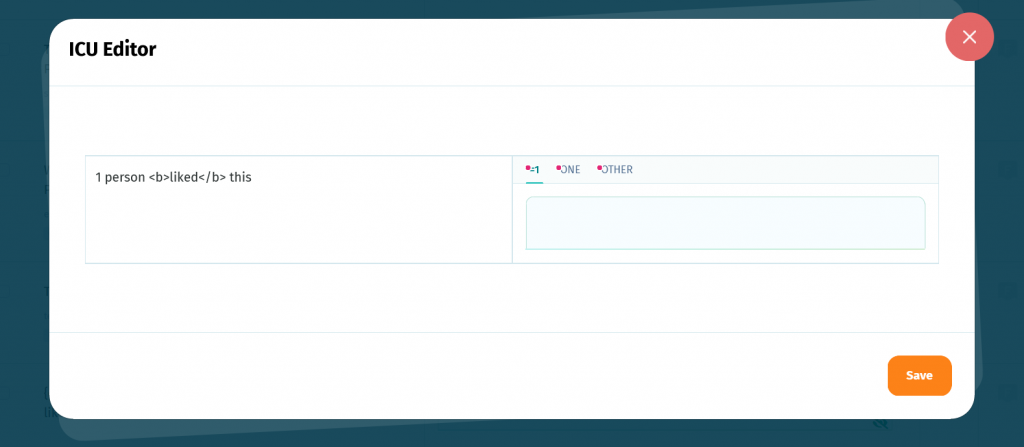
So the same strings you wrote for next-intl go straight in with no special casing.
Wrapping up
Localization always starts small, but it never stays that way. With next-intl, you’ve got a clean path in App Router and Pages Router.
And when you’re ready to collaborate, POEditor is a translation management tool that helps you stay organized and collaborate easily.
That’s it! You’ve got everything you need to ship a Next.js app that feels native.