
If you’re building Vue applications for real-world users, you’ll eventually need to go beyond a single language. That means dealing with translations, formatting numbers and dates correctly, and supporting different locales.
This is referred to as internationalization (i18n) and localization (l10n). The best way to implement it in Vue is with the vue-i18n package.
This guide walks through internationalizing your Vue app with vue-i18n. You’ll learn how to structure translations, wire up locale switching, and manage translations cleanly as your app grows.
Getting started
Before we dive into translations and language switching, let’s make sure your project is set up. If you already have a Vue 3 app running, just install the localization package:
npm install vue-i18nIf you don’t have a project yet, here’s how to spin one up with Vite:
# create a new Vue 3 project with Vite
npm create vite@latest vue-i18n-demo -- --template vue

# move into the project folder and install dependencies
cd vue-i18n-demo
npm install

# start the dev server
npm run dev
Once it’s running, open src/App.vue and replace the default markup with something a bit more realistic:
<template>
  <div class="container">
    <h1>Welcome to MyApp</h1>
    <p>This is a simple localized Vue app.</p>

    <h2>Ongoing Tasks</h2>
    <p>You have {{ tasksCount }} tasks.</p>
  </div>
</template>

<script setup>
const tasksCount = 3
</script>
This gives us a basic UI to work with. Next, we’ll set up vue-i18n and start replacing these hardcoded strings with translatable text.
Basic text translation
Now that localization is set up, let’s add some real translations and understand how it all fits together.
The core idea behind vue-i18n is that instead of hard-coding text directly into your templates, you define it once using translation keys and then pull in the appropriate message depending on the current locale. This makes your app easier to scale across different languages and regions and keeps your UI clean and consistent.
Let’s start by adding a few sample messages. For now, we’ll define them inline directly in main.js so it’s easy to see what’s happening. Later on, we’ll move them to external files, which is how things usually work in production.
Open main.js and update it like this:
import { createApp } from 'vue'
import { createI18n } from 'vue-i18n'
import App from './App.vue'

const i18n = createI18n({
In the code above, we’re using createI18n() to create an i18n instance and pass in our messages — an object containing translations for each locale. Inside each locale, the translations are grouped under a namespace (app in this case) to keep things structured and easier to manage as the app grows.
Once that’s in place, we can start using these translations in the app’s template using the $t() function, which stands for “translate.” For example:
<template>
  <div class="container">
    <h1>{{ $t('app.welcome') }}</h1>
    <p>{{ $t('app.description') }}</p>
    <p>{{ $t('app.tasks', { count: tasksCount }) }}</p>
  </div>
</template>

<script setup>
const tasksCount = 3
</script>
Here, $t('app.welcome') fetches the welcome message based on the active locale, while $t('app.tasks', { count: tasksCount }) shows how to pass dynamic values. This would be explained better later in this guide.
Add a basic language switcher
vue-i18n exposes the current locale on $i18n.locale, so you can bind that to a dropdown and let users switch on the fly. Like this:
<select v-model="$i18n.locale">
  <option value="en">English</option>
  <option value="fr">Français</option>
</select>
When a user picks a different language, vue-i18n automatically updates the UI. You don’t need to reload the page or re-render components manually.

Extracting translations into JSON files
The inline messages setup is fine when you’re just getting started. But once your app grows past a couple of screens, or you start supporting more than one or two languages, it’s better to split translations into dedicated JSON files.
This keeps things clean and also makes it easier to hand off strings to translators or sync with a translation management platform later on.
Here’s a common structure:
src/
└─ locales/
   ├─ en.json
   └─ fr.json
Each file holds a nested object of translation keys and values:
// en.json
{
  "app": {
    "welcome": "Welcome to MyApp",
    "description": "This is a simple localized Vue app.",
    "tasks": "You have {count} tasks."
  }
}
The structure stays the same across languages:
// fr.json
{
  "app": {
    "welcome": "Bienvenue sur MyApp",
    "description": "Ceci est une application Vue localisée.",
    "tasks": "Vous avez {count} tâches."
  }
}
Then update your main.js to import them:
import en from './locales/en.json'
import fr from './locales/fr.json'

const i18n = createI18n({
  locale: 'en',
  fallbackLocale: 'en',
  messages: { en, fr }
})
That’s it. Now you’re not hard-coding translations directly into your config, and your app is set up to scale, both in terms of code and workflow.
Managing translations with POEditor
Once you start supporting multiple languages or if you’re working with other people, managing translation files manually can get tedious fast. That’s where translation management platforms like POEditor come in handy.
Instead of editing JSON files by hand, you upload them to POEditor, where you (or your team) can manage all the translations through a web interface.
To get started, export your existing translations into JSON (if you haven’t already), then upload them to your POEditor project.
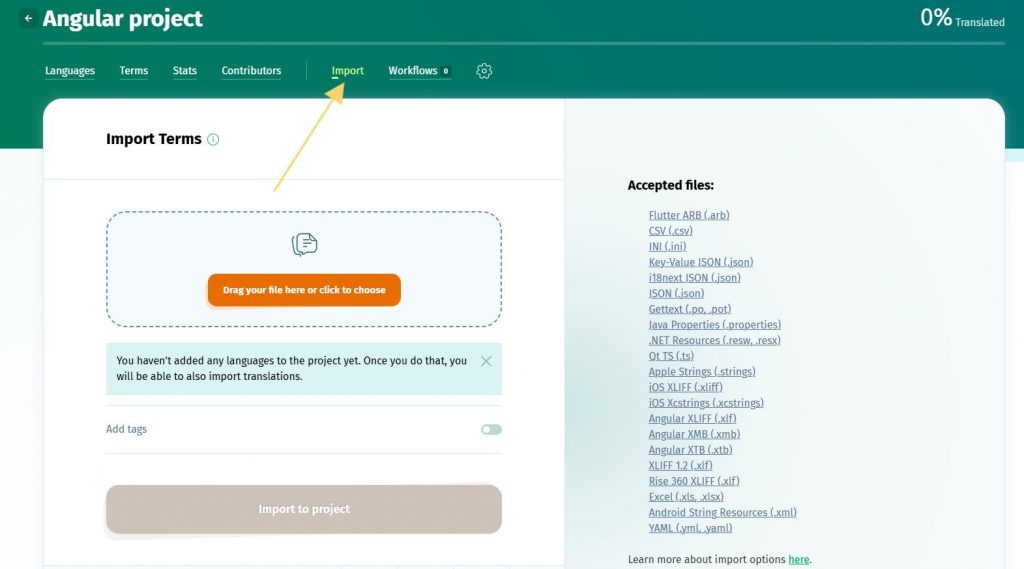
You can do this manually through the dashboard, or automate it with the POEditor API. Here’s what an upload request looks like using curl:
curl -X POST https://api.poeditor.com/v2/projects/upload \
  -F api_token="your_api_token" \
  -F id="your_project_id" \
  -F updating="terms_translations" \
  -F file=@"src/locales/en.json"
This imports your translation keys and values into POEditor so you can start translating immediately. See the upload docs for everything you can tweak.Once your translations are done, you can export updated files using their API too. For example, to download the French version:
curl -X POST https://api.poeditor.com/v2/projects/export \
  -d api_token="your_api_token" \
  -d id="your_project_id" \
  -d language="fr" \
  -d type="json"
This returns a URL where you can download the file and drop it back into src/locales/fr.json. If you want to automate this step (say, as part of a deploy or CI workflow), you can build that in with a simple script.
Now that translations are in place and your workflow is cleaned up, let’s tackle the real-world stuff, like pluralization, formatting, and making sure your app speaks like a local.
Handling dynamic values and interpolations
Most real-world apps need to show personalized or data-driven content. Things like “Welcome back, Sarah” or “You have 3 notifications.” That’s where interpolation comes in.
With vue-i18n, you can define placeholders in your translation messages using double curly braces ({{ }}), then pass in the dynamic values when calling $t().
Let’s say your translation file looks like this:
// en.json
{
  "user": {
    "greeting": "Welcome back, {{name}}!",
    "notifications": "You have {{count}} new notifications."
  }
}
You can render these in your component like this:
<template>
  <div>
    <p>{{ $t('user.greeting', { name: userName }) }}</p>
    <p>{{ $t('user.notifications', { count: notificationCount }) }}</p>
  </div>
</template>

<script setup>
const userName = 'Sarah'
const notificationCount = 3
</script>
The {{name}} and {{count}} in the code above are placeholders in the translation string. When you pass { name: userName } to $t(), vue-i18n replaces {{name}} with the value of userName.
You can also use this pattern for more complex data, like dates or amounts, but we’ll handle that separately when we talk about formatting.
Pluralization and choice formatting
Plural rules vary wildly across languages. In English, it’s straightforward, for example, “1 item” vs. “2 items.” But some languages use different forms for 0, 1, 2–4, or even for numbers that end in specific digits.
Trying to handle that manually with if statements or ternaries quickly becomes a mess. Luckily, vue-i18n handles all of this for you using CLDR plural rules, the same standard behind most modern localization systems.
It knows English only needs two forms (one and other), while Arabic or Russian might require four or five.
Here’s a simple example:
// en.json
{
  "cart": {
    "items": "No items | One item | {count} items"
  }
}
This is a pipe-separated plural rule:
- The first segment (
No items) is used when the count is 0. - The second (
One item) is used when the count is 1. - The third (
{count} items) is used for everything else.
To use this in a component:
<p>{{ $t('cart.items', count) }}</p>
If count is 0, you get: No items, If count is 1, you get: One item, If count is 3, you get: 3 items.
Under the hood, vue-i18n figures out which version of the message to use based on the active locale. That means if your user switches to French or Arabic, it’ll apply the correct grammar rules for that language.
And if you want to customize the behavior, you can use named interpolation along with plural rules:
"likes": "No likes | One like | {count} likes"Then in your template, you’d pass the count like this:
<p>{{ $t('likes', { count: likesCount }) }}</p>Again, vue-i18n takes care of figuring out which form to use. You just pass the number.
Next, let’s explain how to handle translations that include HTML or styled elements, like bolded names, links, or icons, inside your messages.
HTML and rich text in translations
Sometimes you need more than plain text. Maybe you want to bold a user’s name, insert a link, or wrap part of a message in a span. But you can’t just shove raw HTML into your JSON if you care about security or readability.
Vue gives you two ways to handle this:
v-html (for simple, trusted content)
If you know the HTML is safe and controlled (for example, you’re bolding a word or adding emphasis). You can define your translation like this:
// en.json
{
  "banner": {
    "promo": "Enjoy our <strong>limited-time</strong> offer!"
  }
}
Then in your template:
<p v-html="$t('banner.promo')"></p>This works, but be careful as v-html renders raw HTML. If you ever pass untrusted content, you’re opening yourself up to XSS. Never use this with user-generated strings.
<i18n-t> (for dynamic or interactive content)
For anything more complex, especially if you need to mix in components, links, or spans, use the built-in <i18n-t> component. It lets you safely render rich content without giving up reactivity or translation structure.
Here’s a translation string with a placeholder:
"notice": "Check our <link>terms and conditions</link>."And here’s how you use it in a Vue component:
<i18n-t keypath="notice">
  <template #link>
    <a href="/terms" target="_blank">terms and conditions</a>
  </template>
</i18n-t>
In the code above, the translation defines a custom tag: <link>…</link>, and the <i18n-t> component maps that to whatever you put in the #link slot. This keeps things safe, scoped, and still fully localized.
It’s also smart about fallback languages and reactivity, just like $t().
Formatting dates, numbers, and currencies
Localization isn’t just about translating words. It’s also about formatting data in ways that feel natural to the user. That means showing dates, times, and currencies in a way that matches their region.
vue-i18n makes this easy with built-in helpers like d() for dates and n() for numbers. These are available from useI18n() when you’re using the Composition API.
Note: If you’re still using the Options API, you’d use $d() and $n() instead.
Let’s start with a basic example:
<script setup>
import { useI18n } from 'vue-i18n'

const { d } = useI18n()
</script>

<template>
  <p>{{ d(new Date()) }}</p>
</template>
If your locale is set to en-US, this will render 7/22/2025. If you switch to fr-FR, and it becomes 22/07/2025.
Same date, different format, automatically handled based on the active locale. You can also pass in formatting options:
<template>
  <p>{{ d(new Date(), { dateStyle: 'full', timeStyle: 'short' }) }}</p>
</template>
This gives you something like:
Tuesday, July 22, 2025 at 8:30 AMInstead of repeating options inline, you can define reusable format presets when setting up your i18n instance:
const datetimeFormats = {
  'en-US': {
    short: { year: 'numeric', month: 'short', day: 'numeric' },
    long: {
      year: 'numeric',
      month: 'short',
      day: 'numeric',
      weekday: 'short',
      hour: 'numeric',
      minute: 'numeric',
    },
  },
  'ja-JP': {
    short: { year: 'numeric', month: 'short', day: 'numeric' },
    long: {
      year: 'numeric',
      month: 'short',
      day: 'numeric',
      weekday: 'short',
      hour: 'numeric',
      minute: 'numeric',
      hour12: true,
    },
  },
}

const i18n = createI18n({
  locale: 'en-US',
  fallbackLocale: 'en-US',
  datetimeFormats,
})
Then you can call:
<template>
  <p>{{ d(new Date(), 'long') }}</p>
</template>
And vue-i18n will apply the right format based on the active locale.
Number formatting
The same idea applies to numbers.
<script setup>
import { useI18n } from 'vue-i18n'

const { n } = useI18n()
</script>

<template>
  <p>{{ n(1234567.89) }}</p>
</template>
With en-US, it shows 1,234,567.89. With de-DE, it switches to 1.234.567,89. You can learn more in the vue-i18n official documentation.
Formatting currencies
To display currency, pass in a style config:
<template>
  <p>{{ n(29.99, { style: 'currency', currency: 'USD' }) }}</p>
</template>
This renders as $29.99. When you change the locale to ja-JP, and you’ll get ¥3,000.
It uses proper symbols, spacing, and separators based on the user’s region. No manual formatting or regex tricks needed. Learn more here.
Localized routing (optional but powerful)
If you’re building a multi-language app, showing the selected locale in the URL can be a nice touch both for users and for SEO. It tells users what language they’re in and lets them share links that stay consistent.
To do this, you’ll need to combine vue-i18n with vue-router. There are a few ways to approach it, but the simplest pattern is to include the locale as a dynamic route param.
Here’s a basic example of how you might set up routes:
// router/index.js
const routes = [
  {
    path: '/:locale',
    component: AppLayout,
    children: [
      {
        path: 'about',
        name: 'about',
        component: AboutPage
      },
      {
        path: '',
        name: 'home',
        component: HomePage
      }
    ]
  }
]
With that structure, /en/about and /fr/about both map to the same AboutPage, but now you can read the locale param and apply it to vue-i18n.
To make that work, add this to your router file:
// router setup
router.beforeEach((to, from, next) => {
  const locale = to.params.locale

  if (!['en', 'fr'].includes(locale)) {
    return next('en') // fallback
  }

  i18n.global.locale = locale
  next()
})
This sets the current language based on the URL before each route is resolved.
Switching routes programmatically
If your app has a language dropdown, you can make it update the route when the user selects a new language:
<select @change="changeLocale($event.target.value)">
  <option value="en">English</option>
  <option value="fr">Français</option>
</select>
Then, in your script block or setup() function, define the logic:
function changeLocale(locale) {
  router.push({ name: route.name, params: { ...route.params, locale } })
}
That way, your route changes to something like /fr/about and updates the locale at the same time — no need to reload the page.

You can take this further with route guards, default redirects, or storing the user’s preferred language in localStorage. But for most apps, just having the locale in the URL and wiring it to vue-i18n gives you a clean, shareable experience that scales.
Lazy loading translations
When your app supports just one or two languages, it might be fine to bundle all translations upfront. But as your project grows, loading all that at once becomes unnecessary.
You don’t want to make users download five translation files if they only ever use one. That’s where lazy loading comes in.
Let’s say your project looks like this:
src/
├─ locales/
│  ├─ en.json
│  └─ fr.json
├─ i18n.js
├─ main.js
├─ router.js
In i18n.js, create and export the base i18n instance, coupled with some helper functions:
// src/i18n.js
import { createI18n } from 'vue-i18n'

export const SUPPORT_LOCALES = ['en', 'fr']

export function setupI18n(options = { locale: 'en' }) {
  const i18n = createI18n(options)
  setI18nLanguage(i18n, options.locale)
  return i18n
}

export function setI18nLanguage(i18n, locale) {
  if (i18n.mode === 'legacy') {
    i18n.global.locale = locale
  } else {
    i18n.global.locale.value = locale
  }

  document.querySelector('html').setAttribute('lang', locale)
}
This gives you a reusable setupI18n() function to plug into main.js and a setI18nLanguage() helper that sets the active locale, and updates <html lang="">.
Still inside i18n.js, add this function to load a translation file only when it’s needed:
// src/i18n.js (continued)
import { nextTick } from 'vue'

export async function loadLocaleMessages(i18n, locale) {
  const messages = await import(
    /* webpackChunkName: "locale-[request]" */ `./locales/${locale}.json`
  )

  i18n.global.setLocaleMessage(locale, messages.default)

  return nextTick()
}
This uses dynamic import() to split each translation file into its own chunk. When the user switches languages, only that specific file is loaded.
Now open router.js and make sure you’re handling route-based language switching.
If your routes look like /en/about or /fr/contact, then to.params.locale will contain the language code. You can hook into this with a beforeEach navigation guard:
// src/router.js
import { loadLocaleMessages, setI18nLanguage, SUPPORT_LOCALES } from './i18n'

router.beforeEach(async (to, from, next) => {
  const locale = to.params.locale

  if (!SUPPORT_LOCALES.includes(locale)) {
    return next('/en') // fallback if unsupported
  }

  if (!i18n.global.availableLocales.includes(locale)) {
    await loadLocaleMessages(i18n, locale)
  }

  setI18nLanguage(i18n, locale)
  next()
})
Finally, bring everything together in your app entry point:
// src/main.js
import { createApp } from 'vue'
import App from './App.vue'
import router from './router'
import { setupI18n } from './i18n'

const i18n = setupI18n({ locale: 'en', fallbackLocale: 'en', messages: {} })

createApp(App).use(router).use(i18n).mount('#app')
At this point, you’ve got lazy loading working via import() and language switching tied into your router.
Wrapping up
The truth is, localization always starts small, but it never stays that way. More users equal more languages, which leads to more complexity.
By structuring your i18n logic early, you’ll save your team a ton of headaches down the line. If you’re working with a team or targeting more than one market, plug in a translation management tool like POEditor to stay organized and collaborate easily.
That’s it. You now have everything you need to build a fully localized Vue app that doesn’t feel bolted together. Keep it clean, keep it scalable, and your users, no matter what language they speak, will thank you for it.