
Angular is a frontend JavaScript framework built for creating large, maintainable web applications. But out of the box, you’re only able to display content in one language — whatever text you hardcode into your templates.
If you’re building something for a global audience, or just want your app to support multiple languages, you’ll need to set up localization and internationalization.
You may ask: what do those even mean?
In plain terms, internationalization is the process of preparing your app to support different languages and regional settings. Localization, on the other hand, is the actual implementation — translating your content and formatting things like dates, numbers, and currencies to match the user’s language.
In this guide, we’ll walk through Angular internationalization and localization step by step. You’ll learn how to mark text for translation in your Angular app, handle pluralization and dynamic values, generate translation files, and build separate language versions of the app.
Getting started
Before we do anything fancy, it’s assumed you already have an Angular application you want to work with — or at least some basic understanding of how Angular works. So we’ll skip things like setting up components or modules.
But just in case you don’t have a project yet, here’s how to spin one up:
# install Angular CLI
npm install -g @angular/cli

# create a new Angular project
ng new angular-i18n-demo

# navigate into the folder and serve the project
cd angular-i18n-demo && ng serve
Once that’s running, open src/app/app.component.html and replace everything with this:
<div class="container">
  <h1>Welcome to MyApp</h1>
  <p>This is a simple localized Angular app.</p>

  <h2>Ongoing Tasks</h2>
  <p>You have {{ tasksCount }} tasks.</p>
</div>
Then in src/app/app.component.ts, add the tasksCount variable:
export class AppComponent {
  tasksCount = 3;
}
You now have a basic UI with some text we’ll localize in the next steps.
Installing the localization package
Angular doesn’t include localization support by default — you have to add it yourself. Fortunately, the Angular team provides an official package.
To install it, run:
ng add @angular/localizeThis installs the package and adds the required import to your polyfills file, so Angular knows to use the localization system during builds.
That’s it. You don’t have to import anything manually or write any special code to use it.
Marking text for translation
Now that localization is set up, the next step is to mark the text in your templates that you want Angular to translate.
Angular doesn’t automatically translate anything. You have to tell it: “This string should be translated.” You do that using the i18n attribute.
Here’s an example:
<h1 i18n>Welcome to MyApp</h1>That i18n attribute won’t show up in the rendered page, but when you extract translations, Angular will include that line in the output file. If you go ahead to extract translation stirring this way, Angular will generate some hash-looking values as the custom ID to serve as a unique identifier:
<trans-unit id="6273847362193874621" datatype="html">
  <source>Welcome to MyApp</source>
</trans-unit>
That’s fine for simple apps, but not great when working with external translation tools like POEditor — because those tools rely on stable IDs to track changes, reuse strings, and sync across teams.
You can avoid that by assigning your own stable ID using the @@ syntax:
<h1 i18n="@@pageTitle">Welcome to MyApp</h1>This gives you predictable output:
<trans-unit id="pageTitle" datatype="html">
  <source>Welcome to MyApp</source>
</trans-unit>
You can also add a description to help translators understand what a string means — especially when the text is generic (like “Start” or “Submit”).
<p i18n="Intro text shown under the heading">
  This is a simple localized Angular app.
</p>
Angular still generates the ID automatically in this case, but the note gets added. You can combine both a custom ID and a description this way:
<p i18n="Intro message shown under the heading@@introText">
  This is a simple localized Angular app.
</p>
Now you get both:
<trans-unit id="introText" datatype="html">
  <source>This is a simple localized Angular app.</source>
  <note priority="1" from="description">Intro message shown under the heading</note>
</trans-unit>
Extracting translation strings
Once you’ve marked your text with the i18n attribute, the next step is to extract those strings into a translation file that Angular or a translator can work with.
By default, when you run:
ng extract-i18nAngular creates a file called messages.xlf in the root of your project. But you’re not locked into .xlf if that doesn’t work for your team or translation workflow. You can specify a different format, filename, and output path using flags.
Here are the main options:
| Option | What it does |
|---|---|
--format | Sets the file format. Angular supports xlf, xlf2, xmb, json |
--out-file | Changes the name of the file |
--output-path | Sets the folder where the file is saved |
For example, you can extract as JSON to a custom folder:
ng extract-i18n --format json --out-file strings.en.json --output-path src/i18nThis will generate:
src/i18n/strings.en.jsonThe content of the file will still depend on what you’ve marked with i18n in your templates, but the structure will be JSON instead of XML.
But for this guide, we’ll stick to using the default format and store translations in the src/locale folder using this command:
ng extract-i18n --output-path src/localeThis will create a file called messages.xlf inside the src/locale folder.
What the .xlf file looks like
Here’s a simplified example of what you’ll see:
<?xml version="1.0" encoding="UTF-8" ?>
<xliff version="1.2">
  <file source-language="en-US" datatype="plaintext" original="ng2.template">
    <body>
      <trans-unit id="introText" datatype="html">
        <source>This is a simple localized Angular app.</source>
        <note priority="1" from="description">Intro message shown under the heading</note>
      </trans-unit>
    </body>
  </file>
</xliff>
Let’s break that down:
- one string to translate
- id=”introText” = the custom ID you provided (@@introText)
- the actual text from your template
- the description you added (if any)
You’ll see one trans-unit for each piece of marked text in your app.
Creating translation files for other languages
Now that you’ve extracted your strings into messages.xlf, the next step is to actually translate them. That file contains your app’s text in English (or whatever your source language is). To support other languages like French or Spanish, you’ll create a copy of that file and translate the contents.
Let’s say you want to add French. Run:
cp src/locale/messages.xlf src/locale/messages.fr.xlfThis creates a separate file just for French translations. You can name it anything technically, but it’s a good habit to follow the messages.<lang>.xlf naming pattern — it keeps things tidy, especially as you add more languages.
Next, open messages.fr.xlf and look for the blocks. Each one has a <source> (your original text) and a space where you can add a <target> (your translated text).
Here’s what it looks like before translation:
<trans-unit id="introText" datatype="html">
  <source>This is a simple localized Angular app.</source>
  <note priority="1" from="description">Intro message shown under the heading</note>
</trans-unit>
Update it like this:
<trans-unit id="introText" datatype="html">
  <source>This is a simple localized Angular app.</source>
  <target>Ceci est une application Angular localisée.</target>
  <note priority="1" from="description">Intro message shown under the heading</note>
</trans-unit>
Repeat that for every trans-unit in the file. Be careful not to mess with any of the structure — don’t delete any tags like <x id="INTERPOLATION"/>, or the build will break. Only update the text inside <target>.
Using POEditor to manage translations
If you’re working on a real-world app, especially one that supports multiple languages or involves a team — managing translation files manually can get messy fast. A better approach is to use a translation management platform like POEditor.
With POEditor, you can upload your source translation file (like messages.xlf), manage all your strings in a clean web interface, invite translators, and download the updated files when you’re done.
There are different ways to get your translations in and out of POEditor. The simplest way is to log in to your dashboard, select your project, and import your messages.xlf file directly.
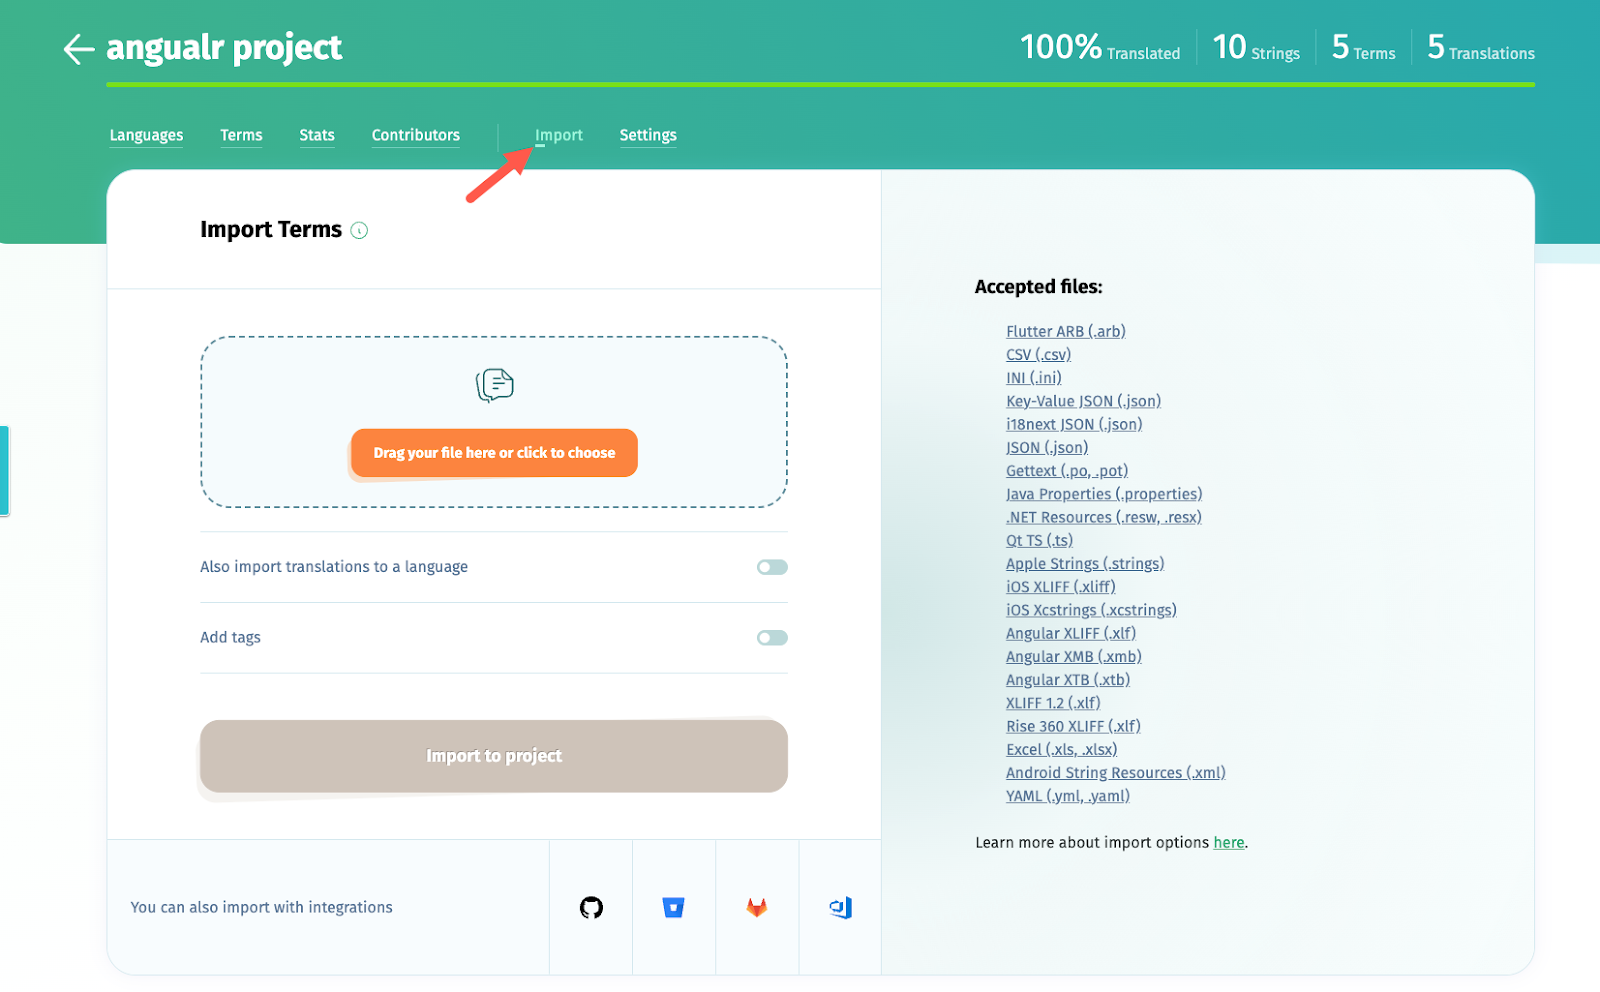
POEditor will detect your keys and source strings, and let you start translating immediately.
If you want to automate your workflow — say, as part of a CI/CD pipeline, you can upload your .xlf files programmatically using POEditor’s API.
Here’s a basic example using curl:
curl -X POST https://api.poeditor.com/v2/projects/upload \
-F api_token="your_api_token" \
-F id="your_project_id" \
-F updating="terms" \
-F file=@"src/locale/messages.xlf"
There are other optional flags you can use, like overwrite, sync_terms, or even tagging new and removed keys. See the upload docs for everything you can tweak.
Once translations are done, you can use the POEditor export API to fetch the updated file in your desired format. For Angular, that’s usually xlf or xliff_1_2.
curl -X POST https://api.poeditor.com/v2/projects/export \
-d api_token="your_api_token" \
-d id="your_project_id" \
-d language="fr" \
-d type="xlf"
This will return a URL where you can download the French translation file. You can then save that as messages.fr.xlf in your project’s src/locale/ folder.
Handling pluralization in Angular (ICU expressions)
Let’s say you want to display how many tasks a user has. If it’s 0, you want to show “You have no tasks.” If it’s 1, “You have one task.” If it’s 3, then “You have 3 tasks.”
If you just did this in plain HTML, you’d have to write a mess of *ngIf blocks to check for each case. But there is a better way with ICU (International Components for Unicode) expressions — a standard way of writing conditional text for things like pluralization, gender, and status.
Here’s how you show task counts in a clean, translation-ready way:
<p i18n>
  {tasksCount, plural,
    =0 {You have no tasks}
    =1 {You have one task}
    other {You have {{ tasksCount }} tasks}
  }
</p>
Let’s break it down:
- tasksCount is a variable from your component
plural is the ICU keyword - 0, =1, and other are the rules you’re defining
- You can still use interpolation ({{ tasksCount }}) inside the message
In your component, you’d just define:
export class AppComponent {
  tasksCount = 3;
}
When you run ng extract-i18n, Angular outputs two things for this ICU expression. The first is a wrapper <trans-unit> with your optional ID or description:
<trans-unit id="tasksPlural" datatype="html">
  <source>
    <x id="ICU" equiv-text="{tasksCount, plural, =0 {You have no tasks} =1 {You have one task} other {You have {{ tasksCount }} tasks} }"/>
  </source>
  <note priority="1" from="description">Pluralized task count</note>
</trans-unit>
A second trans-unit with the full ICU logic:
<trans-unit id="6482371983123478371" datatype="html">
  <source>{VAR_PLURAL, plural, =0 {You have no tasks} =1 {You have one task} other {You have <x id="INTERPOLATION"/> tasks}}</source>
</trans-unit>
Don’t touch the placeholders like <x id="INTERPOLATION"/>. That’s how Angular swaps in the value of tasksCount during runtime.
Let’s say you’re localizing this into French. You’d go into your messages.fr.xlf and update the target of the ICU expression like this:
<trans-unit id="6482371983123478371" datatype="html">
  <source>{VAR_PLURAL, plural, =0 {You have no tasks} =1 {You have one task} other {You have <x id="INTERPOLATION"/> tasks}}</source>
  <target>{VAR_PLURAL, plural, =0 {Vous n'avez aucune tâche} =1 {Vous avez une tâche} other {Vous avez <x id="INTERPOLATION"/> tâches}}</target>
</trans-unit>
Angular will pick the right message automatically based on the value of tasksCount.
You should also know that different languages support different plural rules. For example:
- English: =0, =1, other
- Russian: one, few, many, other
- Arabic: has six!
You can also use category names like zero, one, few, many, other instead of hardcoded values. Angular follows CLDR plural rules behind the scenes.
{itemCount, plural,
  zero {No items}
  one {One item}
  few {A few items}
  many {Many items}
  other {# items}
}
Make sure to only use categories supported by the target language. English, for example, ignores few and many.
Formatting dates, numbers, and currency based on locale
Apart from translating text, internationalization also means displaying values like dates, numbers, percentages, and money in a way that feels familiar to your users.
Angular makes this easy using built-in pipes — and these pipes are locale-aware. That means they automatically adapt to the active language/region when you build a localized version of your app.
Date formatting with date pipe
Say you have a date value:
export class AppComponent {
  today = new Date();
}
You can display it in your template like this:
<p i18n>The date today is: {{ today | date }}</p>By default, this will follow the formatting of the active locale at build time.
- In English (US): Apr 15, 2025
- In French: 15 avr. 2025
You can customize the format too:
<p i18n>Full date: {{ today | date: 'fullDate' }}</p>Other useful formats: shortDate, mediumDate, 'yyyy-MM-dd', etc.
Currency formatting with currency pipe
If you want to show prices or amounts of money:
price = 1999.5;In your template:
Price: {{ price | currency:'USD' }}In English, this will show as: $1,999.50. If you build for French and switch to EUR:
<p i18n>Prix : {{ price | currency:'EUR':'symbol' }}</p>This will show: 1 999,50 €. Notice how the decimal symbol, currency position, and spacing all change depending on the locale.
Percent and decimal pipes
In a case where you want to show a percentage, you just have to attach the percent pipe:
<p i18n>Completed: {{ completion | percent }}</p>You can also use number for decimal formatting:
<p i18n>Score: {{ completion | number:'1.1-2' }}</p>This will round and format the number according to the locale.
Translating text inside components
So far, everything we’ve translated has been inside HTML templates — which covers most use cases. But sometimes you have strings that live inside your TypeScript code.
Think of toast messages, errors from services, dialog text and anything dynamic that isn’t in the template. For those, Angular gives you the $localize function.
It works just like a tagged template literal — meaning you can write:
const msg = $localize`Some string to translate`;Then Angular will treat that string just like it does with i18n in your templates: it will extract it, let you translate it in your .xlf file, and replace it with the correct translation at build time.
Here is a basic usage:
showSuccess() {
  this.toastr.success($localize`Changes saved successfully.`);
}
That string will be picked up when you extract translations, just like template content.
You can also insert variables into the translated message:
const username = 'Joe';
const message = $localize`Hello, ${username}!`;
When Angular extracts this, it adds a placeholder (INTERPOLATION) that can be translated separately.
In the .xlf file, it’ll show something like:
<trans-unit id="67238476392834" datatype="html">
  <source>Hello, <x id="INTERPOLATION"/>!</source>
</trans-unit>
You can also provide context or a custom ID for $localize, just like in templates. Here’s how:
const message = $localize`:Shown when the user logs in successfully@@loginSuccess:Welcome back!`;This gives you full control over how the string appears in the .xlf file.
Configuring Angular for localization
At this point, you’ve marked your text using i18n and $localize, extracted strings into a translation file and translated those strings manually or through a tool like POEditor.
Now it’s time to tell Angular where your translated files live, and what languages your app should support.
This setup happens in one place: your angular.json file.
Open your angular.json file, and inside the project block (usually under “projects” → “your-app-name“), add an i18n section.
Here’s what it looks like if your app supports English (default) and French:
"i18n": {
  "sourceLocale": "en-US",
  "locales": {
    "fr": {
      "translation": "src/locale/messages.fr.xlf"
    }
  }
}
Still inside angular.json, scroll down to this section:
"architect" → "build" → "options"
Add this line:
"localize": true
It should look something like this:
"options": {
  "outputPath": "dist/angular-i18n-demo",
  "index": "src/index.html",
  "main": "src/main.ts",
  "polyfills": [
    "zone.js",
    "@angular/localize/init"
  ],
  ...
  "localize": true
}
This tells Angular that when it builds the app, generate versions for every language configured.
If you want to serve or test one language at a time using ng serve, you’ll need to add per-locale entries under the "configurations" section.
For example, still inside the "build" section:
"configurations": {
  "production": {
    ...
  },
  "fr": {
    "localize": ["fr"]
  }
}
And under "serve":
"serve": {
  "builder": "@angular-devkit/build-angular:dev-server",
  "configurations": {
    "development": {
      "buildTarget": "your-app-name:build:development"
    },
    "fr": {
      "buildTarget": "your-app-name:build:development,fr"
    }
  }
}
Now you can test the French version with:
ng serve --configuration=frNow you’re ready to build separate versions of your app for each language. Just run:
ng build --localizeThis will generate:
/dist/your-app-name/en/
/dist/your-app-name/fr/
Each folder contains a fully translated version of your app, ready to be deployed.
Adding a language switcher
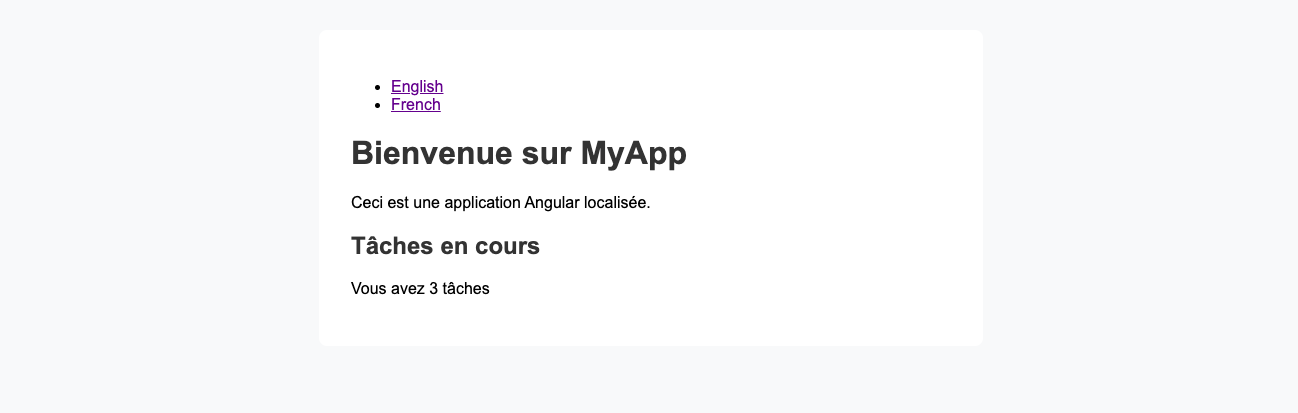
Once you’ve built localized versions of your Angular app (like /en/, /fr/), you probably want users to be able to switch between them.
Since each language is essentially a separate version of the app living in its own folder, all you need is a basic link switcher.
In your app.component.ts, define your list of supported locales:
export class AppComponent {
localesList = [
{ code: 'en-US', label: 'English' },
{ code: 'fr', label: 'Français' }
];
}
And in your template, render the links:
<ul>
  <li *ngFor="let locale of localesList">
    <a href="/{{ locale.code }}/">{{ locale.label }}</a>
  </li>
</ul>
Clicking these links will just navigate to a different localized version of your app, like:
/en/→ English version/fr/→ French version
Each one lives inside its own folder, like dist/angular-i18n-demo/browser/en/ and …/fr/.
You can test this out locally with npx serve. After running a localized build, just run:
npx serve dist/angular-i18n-demo/browserNow visit:
http://localhost:3000/en/http://localhost:3000/fr/
You should see the correct translated versions, and your switcher links will work as expected.
If you deploy to something like Netlify or Firebase Hosting, the idea is the same — you just serve the folders for each locale. Clicking a language link loads that version of your app.
Wrapping up
If you’ve followed everything up to this point, you now have a fully localized Angular app. You’ve seen how to:
- Mark both template and code strings for translation
- Handle plurals, numbers, dates, and currencies properly
- Extract and manage translations using tools like POEditor
- Configure Angular to recognize multiple languages
- Build and serve separate versions of your app per language
Angular’s built-in localization system is powerful — especially for apps that don’t need runtime language switching. But just keep in mind: it’s built around compile-time localization. If your app needs to switch languages dynamically without a full page reload, you’ll want to consider libraries like ngx-translate or Transloco.
Otherwise, Angular’s native i18n tooling gives you a clean, structured way to create fast, translated apps — with zero runtime overhead.
That’s it. You’re now set up to build Angular apps that speak more than one language — and speak them well.